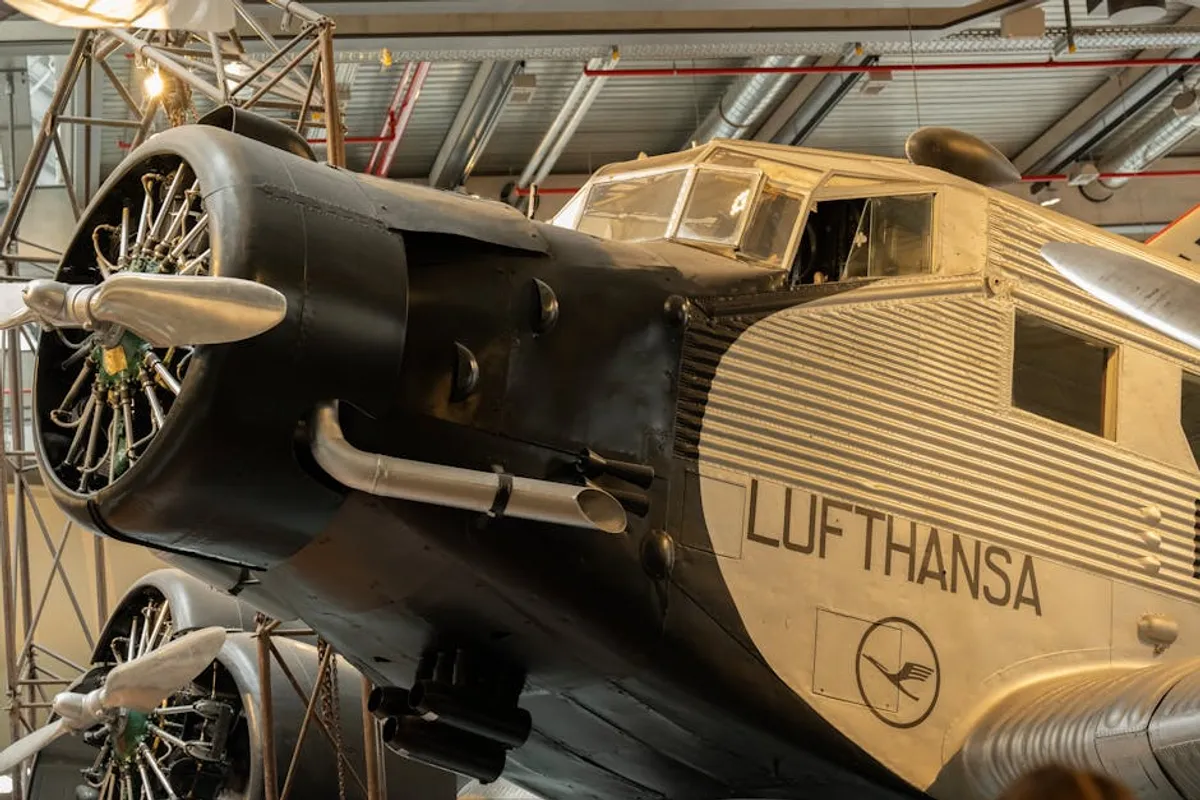
Museum photography presents a unique confluence of artistic appreciation, technical challenge, and strict etiquette. Unlike open-air landscapes or controlled studio environments, museums impose specific constraints: often low light, no flash policies, reflective surfaces, and the constant presence of other visitors. The objective is not merely to document, but to capture the essence of an exhibit, respecting the art, the institution, and the experience of others. This guide provides actionable strategies for securing high-quality images that convey the atmosphere and detail of museum collections, even under challenging conditions. It moves beyond basic camera settings, focusing instead on a holistic approach that integrates technical skill with mindful observation and adherence to institutional guidelines.
Key Considerations for Museum Photography
Before even raising a camera, understanding the specific context of museum photography is paramount. Each institution maintains its own set of rules, often posted at entrances or on their websites. These policies dictate what equipment is allowed, whether tripods are permitted, and the universal prohibition against flash photography. Beyond the rules, ethical considerations play a significant role. Respect for the artwork means avoiding direct contact and maintaining a safe distance. Respect for other visitors means minimizing disruption, moving efficiently, and being aware of personal space. Preparation involves checking these guidelines beforehand, understanding your camera's low-light capabilities, and selecting appropriate lenses that can perform well in varied indoor conditions. This proactive approach ensures a smoother, more productive photographic session that adheres to both technical and social protocols.
1. Understand Museum Photography Policies
Every museum operates under specific guidelines regarding photography, which can range from outright bans to permissive allowances for personal use. These policies are not arbitrary; they protect delicate artworks from potential light damage, minimize disruption to other visitors, and maintain the institution's intellectual property rights. Before visiting, consult the museum's official website or inquire at the entrance. Key areas to clarify include flash usage (almost universally prohibited), tripod/monopod allowances, and restrictions on professional-grade equipment or commercial use. Adherence to these rules is non-negotiable; violations can lead to intervention by staff or even expulsion.
Best for: Ensuring a problem-free visit; avoiding conflicts with museum staff; respecting institutional protocols.
Pros: Guarantees compliance, allowing you to focus on composition rather than worrying about rules; demonstrates respect for the institution and its collection; prevents potential damage to light-sensitive artifacts.
Cons: Policies can vary significantly between museums, requiring pre-visit research for each location; some restrictions might limit creative options, such as the inability to use a tripod for long exposures.
Verdict: Fundamental first step for any museum photographer. Prior knowledge of specific rules is essential for a productive and ethical photographic experience, preventing unnecessary interruptions.
2. Master Low-Light Techniques
Given the universal prohibition of flash photography in museums, proficiency in low-light shooting is not merely advantageous but critical. This involves a precise understanding of the exposure triangle: ISO, aperture, and shutter speed. Prioritize a wide aperture (low f-number, e.g., f/1.8 to f/4) to maximize light intake and create shallow depth of field, isolating subjects. Increase ISO sensitivity cautiously, balancing light gain against image noise. Modern cameras handle higher ISOs (e.g., 1600-6400) with acceptable noise levels. Adjust shutter speed to be fast enough to prevent motion blur from camera shake (typically 1/60th second or faster for handheld, depending on lens focal length and stabilization), but slow enough to capture available light. Image stabilization (in-camera or lens-based) is highly beneficial.
Best for: Capturing detail and atmosphere in dimly lit galleries; photographing light-sensitive exhibits; achieving sharp images without flash.
Pros: Yields natural-looking, atmospheric images; avoids disturbing other visitors; prevents potential damage to artworks from flash; allows for creative use of shallow depth of field.
Cons: Requires cameras with good high-ISO performance; can introduce digital noise if ISO is pushed too high; demands steady hands or image stabilization; limited depth of field might not suit all compositions.
Verdict: Non-negotiable for successful museum photography. Developing a strong command of manual exposure settings and understanding your camera's low-light limits directly translates to higher quality results.
3. Control Reflections and Glare
Museums frequently display artworks behind glass or in showcases, creating challenging reflections from ambient light, overhead fixtures, or even other visitors. Effectively managing these reflections is crucial for clear, unobstructed images. Position yourself at an angle to the glass, rather than directly in front, to minimize direct reflections. Look for areas where the light source is not directly bouncing back into your lens. A polarizing filter can significantly reduce glare from non-metallic surfaces, allowing for clearer views through glass. Using your body or a dark piece of cloth to block stray light from hitting the glass directly can also help. Pay close attention to your own reflection in the frame.
Best for: Photographing paintings, documents, or artifacts behind protective glass; improving clarity and detail in showcase exhibits.
Pros: Eliminates distracting glare, revealing the true colors and textures of the artwork; enhances image clarity and professionalism; reduces post-processing effort to remove reflections.
Cons: Requires careful positioning and awareness of light sources; polarizing filters can reduce light transmission, necessitating higher ISO or slower shutter speeds; may not eliminate all reflections in complex lighting scenarios.
Verdict: A critical skill for capturing unobstructed views of protected exhibits. Strategic positioning and the judicious use of a polarizing filter are key to producing clean, impactful images.
4. Focus on Composition and Framing
Beyond technical settings, strong composition elevates a mere snapshot to a compelling photograph. In museums, this means intentionally framing subjects to highlight their significance and context. Utilize the rule of thirds to place subjects off-center for dynamic balance. Look for leading lines within the exhibit or architecture to draw the viewer's eye. Consider negative space to give the artwork room to breathe. Frame artworks within their architectural settings to convey scale and environment. Don't be afraid to crop tightly to focus on specific details, or conversely, shoot wider to include the surrounding gallery for context. Experiment with different angles – low, high, or eye-level – to find the most impactful perspective.
Best for: Creating visually engaging and artistic photographs; conveying the scale and context of exhibits; guiding the viewer's attention.
Pros: Produces more artistic and memorable images; enhances the storytelling aspect of your photography; encourages deliberate observation of the artwork and its environment.
Cons: Requires time and patience to find optimal angles and framing; can be challenging in crowded galleries where space is limited; may require moving around, potentially disrupting others.
Verdict: Transforms simple documentation into expressive art. A thoughtful approach to composition ensures your museum photographs are not just records, but visual narratives.
5. Capture Details and Textures
Museums are treasure troves of intricate details often overlooked by the casual observer. From the brushstrokes of a painting to the patina of an ancient sculpture or the delicate weave of a textile, these micro-elements convey craftsmanship and history. Use a macro lens if permitted, or a telephoto lens with good close-focusing capabilities, to isolate and magnify these features. Pay attention to lighting that enhances texture, such as raking light that casts subtle shadows. Focus precisely on the most compelling element of the detail. These close-ups provide a unique perspective, revealing aspects that might be missed in a broader shot and adding depth to your photographic narrative.
Best for: Highlighting craftsmanship, material quality, and historical wear; adding visual interest through close-up perspectives; revealing hidden narratives within larger pieces.
Pros: Offers a unique and intimate view of artworks; provides compelling visual variety in a photographic series; often less affected by crowds than full exhibit shots; showcases the artist's technique.
Cons: May require specific lenses (macro or telephoto) not always practical for general museum photography; demands precise focusing; can be challenging to achieve without disturbing the exhibit or other visitors.
Verdict: Elevates museum photography beyond mere documentation, offering viewers an intimate glimpse into the artistry and materiality of the exhibits. Essential for conveying depth and craftsmanship.
6. Utilize Available Light Creatively
Since flash is prohibited, mastering the use of existing light sources is paramount. Museums often employ carefully designed lighting schemes to illuminate artworks, which can be leveraged for dramatic effect. Look for spotlights that create strong contrasts, highlighting specific features. Observe how natural light from windows interacts with exhibits, changing throughout the day. Position yourself to use backlighting for silhouettes, side lighting for texture, or front lighting for even illumination. Avoid shooting directly into bright light sources unless intentionally creating lens flare or a specific artistic effect. Understanding how light falls on a subject allows you to manipulate shadows and highlights to emphasize form and mood.
Best for: Enhancing mood and drama in photographs; working within existing museum conditions; creating visually dynamic images without external lighting.
Pros: Produces authentic, atmospheric images that reflect the museum's intended presentation; avoids the harsh, flat look of direct flash; encourages creative problem-solving and observation.
Cons: Light conditions are entirely dependent on the museum's design and external factors; can be inconsistent, requiring constant exposure adjustments; challenging to achieve even lighting across an entire scene.
Verdict: A cornerstone of effective museum photography. Skillfully using available light transforms environmental constraints into artistic opportunities, yielding evocative and authentic images.
7. Shoot Without Flash, Always
This point cannot be overstressed: never use flash in a museum. The reasons are multifaceted and critical. Flash can cause irreversible damage to light-sensitive materials, such as textiles, paper, and pigments, accelerating their degradation. It also creates harsh, unflattering light, producing blown-out highlights and deep shadows that obscure detail. Furthermore, a sudden flash is highly disruptive to other visitors, breaking their concentration and enjoyment of the artwork, and can even startle them. Respect for the art, the institution, and fellow patrons dictates absolute adherence to this rule. Rely instead on your camera's low-light capabilities and the available ambient light.
Best for: Preserving artworks from light damage; maintaining a respectful and undisturbed atmosphere for all visitors; producing natural-looking photographs.
Pros: Protects invaluable cultural heritage; ensures a pleasant experience for everyone in the gallery; results in softer, more aesthetically pleasing illumination from ambient sources.
Cons: Requires greater technical skill in low-light conditions; necessitates a camera with good high-ISO performance; limits the ability to "freeze" fast motion in extremely dark environments.
Verdict: An absolute, non-negotiable rule. Shooting without flash is fundamental to ethical and effective museum photography, safeguarding both the art and the visitor experience.
8. Use a Tripod or Monopod (When Permitted)
While often restricted, a tripod or monopod can be a game-changer for museum photography, particularly when long exposures are necessary in very low light. These stability tools eliminate camera shake, allowing for slower shutter speeds and lower ISO settings, which translates to cleaner, sharper images with less digital noise. A monopod offers more portability and is often more readily accepted than a full tripod, providing a significant stability boost while remaining relatively unobtrusive. Always verify the museum's policy before bringing one; some institutions might allow monopods but prohibit tripods, or ban both entirely.
Best for: Achieving maximum sharpness in low-light conditions; enabling longer exposures for architectural shots; reducing reliance on high ISO settings.
Pros: Significantly improves image sharpness and detail, especially in challenging lighting; allows for lower ISOs, reducing image noise; facilitates precise composition and framing; can be less fatiguing for holding heavy camera setups.
Cons: Often prohibited in museums due to space constraints and safety concerns; can be cumbersome to carry and set up; may obstruct pathways for other visitors if not used mindfully.
Verdict: A highly beneficial tool for maximizing image quality in low-light museum settings, provided institutional policies permit its use. Always check rules first and use discreetly.
9. Choose the Right Lens for the Exhibit
The choice of lens significantly impacts the type of images you can capture. A versatile zoom lens (e.g., 24-70mm f/2.8 or 24-105mm f/4) is a good general-purpose option, covering a range of focal lengths for both wide shots and moderate close-ups. For very low light, a fast prime lens (e.g., 35mm f/1.8 or 50mm f/1.8) is invaluable due to its wider maximum aperture, allowing for more light and shallower depth of field. If focusing on intricate details, a macro lens is ideal. Wide-angle lenses (e.g., 16-35mm) are excellent for capturing the grandeur of museum architecture or large installations. Consider the specific exhibits you plan to photograph and select lenses that best suit those subjects and the ambient light conditions.
Best for: Adapting to diverse exhibit types and lighting; optimizing light gathering; achieving specific creative effects (e.g., shallow depth of field, wide architectural views).
Pros: Enhances photographic versatility; improves image quality in specific scenarios (e.g., primes in low light, macro for details); allows for creative expression through focal length and aperture control.
Cons: Carrying multiple lenses can be cumbersome; frequent lens changes risk dust on the sensor; fast prime lenses may lack zoom flexibility; specialized lenses can be expensive.
Verdict: Strategic lens selection is crucial for maximizing photographic potential within a museum. A well-chosen lens can overcome environmental challenges and unlock creative possibilities.
10. Respect Other Visitors and Artwork
Museums are shared spaces, and mindful conduct is as important as technical skill. Prioritize the experience of other visitors over securing a perfect shot. Avoid blocking pathways or standing in front of artworks for extended periods. Be discreet with your camera equipment; large bags or excessive gear can be intrusive. Never touch or lean on artworks or their display cases. Maintain a respectful distance from all exhibits, both for their preservation and to allow others to view them unimpeded. Keep noise to a minimum, silence phone notifications, and avoid loud conversations. Your presence should enhance, not detract from, the contemplative atmosphere of the museum.
Best for: Ensuring a pleasant experience for all museum-goers; upholding museum etiquette; preventing accidental damage to exhibits.
Pros: Fosters a positive environment for everyone; avoids conflicts with staff or other visitors; demonstrates professionalism and consideration; contributes to the longevity of cultural artifacts.
Cons: May require sacrificing certain shots if they impede others; demands constant awareness of your surroundings; can be challenging in very crowded galleries.
Verdict: Ethical conduct is paramount. Respect for the space, the art, and fellow visitors not only ensures a smooth visit but also reflects positively on the photographic community.
11. Embrace Post-Processing for Refinement
Post-processing is an integral part of modern photography, especially for museum images where conditions are often less than ideal. Software like Adobe Lightroom or Capture One allows for non-destructive adjustments that can significantly enhance your photos. Key adjustments include correcting white balance (museum lighting can be tricky), recovering shadows and highlights, sharpening details, and reducing digital noise introduced by high ISOs. Cropping and straightening can refine composition. A light touch is often best; the goal is to enhance the image, not to create an artificial representation. Shoot in RAW format to retain maximum image data for greater flexibility in post-processing.
Best for: Correcting exposure and color inaccuracies; reducing noise; enhancing detail and sharpness; refining composition after the fact.
Pros: Improves the overall quality and aesthetic of photographs; compensates for challenging shooting conditions; allows for creative interpretation and consistency across a series; unlocks the full potential of RAW files.
Cons: Requires dedicated software and a learning curve; can be time-consuming; over-processing can lead to unnatural-looking results; might not fully salvage severely underexposed or blurry images.
Verdict: Essential for producing polished, high-quality museum photographs. Thoughtful post-processing can transform good captures into exceptional ones, overcoming many in-camera limitations.
12. Tell a Visual Story
Rather than simply documenting individual pieces, aim to tell a broader story about your museum visit or a specific exhibit. This involves planning your shots and thinking about how they will fit together. Capture wide shots to establish context and scale, medium shots to highlight key artworks, and close-ups to reveal intricate details. Include images of the museum's architecture, the flow of visitors, or even the subtle interactions between people and art. Sequence your images to create a narrative flow. A cohesive series of photographs that tells a story is often more impactful and memorable than a collection of isolated images.
Best for: Creating compelling photographic series; conveying the full museum experience; engaging viewers on a deeper level; showcasing a personal interpretation of the visit.
Pros: Elevates photography beyond simple documentation; encourages thoughtful observation and planning; results in a more cohesive and impactful body of work; offers a unique perspective on the museum.
Cons: Requires more time and deliberate planning during the visit; can be challenging to execute in crowded or restricted environments; demands a clear vision for the narrative.
Verdict: Transforms individual photographs into a cohesive, engaging experience. A narrative approach adds depth and meaning, making your museum photography resonate more powerfully.
Evaluating and Improving Your Museum Photography
Improving museum photography is an iterative process that combines technical review with critical self-assessment. After a visit, review your images on a large screen, not just your camera's LCD. Critically assess sharpness, exposure, color accuracy, and composition. Identify recurring issues: are your low-light shots consistently noisy? Are reflections still a problem? Is your framing consistently strong, or do you find yourself cropping heavily in post-processing? Experiment with different camera settings and angles during subsequent visits. Seek feedback from other photographers. Pay attention to how professional museum photographers capture exhibits in books or online, analyzing their techniques for lighting, perspective, and detail. Continuous practice, combined with a willingness to learn from each session, is the most effective path to refinement.
Frequently Asked Questions
Q: Can I use my smartphone for museum photography?
A: Yes, many modern smartphones offer excellent cameras with good low-light performance. They are discreet and often allowed where larger cameras might be restricted. Focus on composition and utilize their computational photography features, but remember the no-flash rule still applies. While they lack the sensor size and lens flexibility of dedicated cameras, they are capable of producing high-quality images for personal use.
Q: What's the best camera for museum photography?
A: A mirrorless or DSLR camera with a large sensor (APS-C or full-frame) and good high-ISO performance is ideal. Pair it with fast prime lenses (f/1.8 or f/1.4) or versatile zoom lenses with wide apertures (f/2.8). In-body or lens image stabilization is highly beneficial for handheld shooting in low light. The "best" camera is ultimately one you are comfortable operating manually in challenging conditions.
Q: Is flash ever allowed in a museum?
A: Almost universally, no. Flash photography is prohibited due to its potential to damage light-sensitive artifacts and its disruptive nature to other visitors. Always assume flash is forbidden unless explicitly stated otherwise by the museum, which is exceedingly rare.
Q: How can I avoid blurry photos without using flash?
A: To avoid blur in low light without flash, maximize light intake: use a wide aperture (low f-number), increase ISO carefully, and maintain the fastest possible shutter speed that still allows for proper exposure. Utilize image stabilization (lens or in-camera) and maintain a steady stance. If permitted, a monopod or tripod will eliminate camera shake entirely, allowing for very slow shutter speeds.
Q: How do I deal with crowds when trying to photograph an exhibit?
A: Patience is key. Visit during off-peak hours if possible (weekdays, early mornings, late evenings). Wait for gaps in the crowd. Sometimes, a slightly elevated or lower perspective can help you shoot over or under heads. Focus on details when full exhibit shots are impossible. Embrace the crowd as part of the museum experience, sometimes including people in your frame can add scale or a sense of atmosphere.